Sunday, November 27, 2016

A SMALL SHED I BUILT LAST YEAR


The dimensions of the base are 4 by 8 feet. the sills are made of 2 by 6 pressure treated.  You have to make two layers of sill with the corners interwoven for strength. Galvanized common nails are best here where moisture might be an issue.  Nail along the length as well as at the corners.  Make all the nails go in at an angle.  They are 3 1/2 inches long.  the angle will make them protrude less and they will be stronger.
 
 
I like nails because they are less brittle than sheet rock screws. Here is a detail of the interweaving.

 
Do not skimp on the nails but do not use so many that they split the boards into matchsticks.

 
When the sills are completed, run a scrap diagonal after squaring to keep them from going off square as you work.
 
 
I did the pressure treated floor joists by toe nailing from both sides.  This is pretty strong, and since the floor is small, it does not matter much as the decking will help to support it all.  you can use joist hangers if you like but this was the old way and it works without the expenditure.  you could put these in by doing one layer of sill, nailing through into the end grain, then adding the second layer of sill.  All are sixteen inches on center beginning at the outside corner.  This will work out to an even 8 feet.

 
Another detail of the joists.

 
Hemlock rough sawn is a bit thicker than normal and is rot resistant.  It also provides a bit of ventilation.  I am using common bright nails here because there will not be as much moisture.  Use galvanized if you like.
  Deck screws or nails work too.
 
The finished deck is set aside and the diagonal can be removed.
 
 
The back wall runs all the way from corner to corner.  All are at 16 inches on center.  As I am not finishing the inside, it is not necessary to double or triple the corner to provide a nailing surface.  I am nailing through the bottom and top plate into the end grain of the studs.

 
Here is the front wall with its door opening.  There are ripple studs and a header for the door and one small cripple.  I did not make an enormous header as the weight will  not be that great on this and the door will not likely fit tightly.

 
 One of the end walls. They fit inside the two long walls so the 16 inches on center begins at the corner not at the edge of this wall.  Notice the two side spaces  are narrower than the center space, but they are still 16 inches on center taking the corner into account.

 
The other end wall.  A window can always be put between the studs without special framing, especially with sheet goods.  I would not try that with a house though.

 
The four walls are framed, but it all works better if Harry is supervising.

 
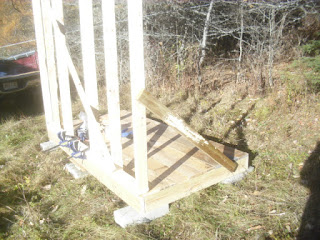
The deck has been placed and leveled on blocks directly on the soil.  this could be put on sonotubes extending below the frost line.  This could also be on large pressure treated skids laid on the ground or on a prepared site with a deep gravel base.

 
Sometimes boards may not be straight.  Here I nailed the ends down on the deck and into the sills.  I used clamps to draw the plate into line with the edge, then nail it down.

 
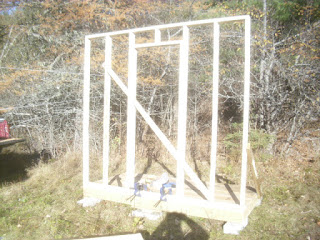
Once the wall is up and leveled up, scrap boards hold the wall up and level as you build.
Always keep larger pieces of scrap lumber if you can for such uses.  Use common nails.
 
 
Notice the framing of the door. This is the front.

 
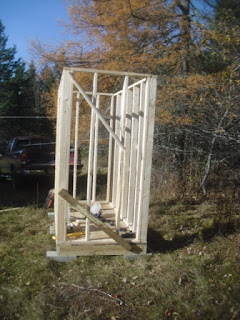
All four walls are up.  The corner studs are nailed to each other along the length of the stud.

 
As above.

 
a second layer of top plate is nailed over the top.  The corners are woven together and nailed to give strength.

 
Here is a finished corner.

 
Another view of the corner construction.

 
Still another.

 
Diagonals are left on the wall studs till permanent sheathing is installed, and metal ones may be used permanently.

 
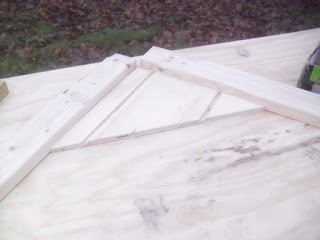
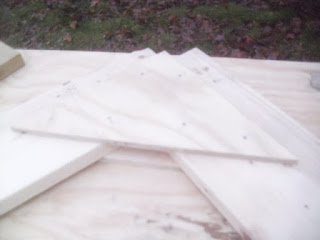
I nailed boards to a sheet of sheathing to use as a template for the seven roof trusses.  I am sorry that I do not have a picture of a finished truss or their installation, the camera rebelled and it started to snow.   The trusses must be nearly identical, or the roof decking will not sit flat or cooperate when nailing.

 
There re three layers to the upper joint of the truss.  A cross piece added at the end forms the ceiling joist and keeps the rafters from spreading with snow weight. The first layer is a piece of sheet goods that will bridge the joint.

 
Next the joist is laid in place.  this would not lie level if there was not a scrap spacer at the lower part of the template to support the legs.  se a couple of photos below. 

 
The second leg is added to the template.   Aligning them properly is just as important as cutting at the proper angle.  These are 45 degrees.
 
 
Measure time and time to make sure that each truss is identical.  Width of the legs, length of the legs, angles fitting properly etc.

 
At last the tape is in the right place and the length is correct.  One nail is put in the top of each leg then the measurements are checked again. 

 
Nail in place with the one nail and check the measurements again.

 
Check every conceivable angle and measurement to make it come out right. 

 
As above.

 
Recheck!

 
When all has been checked then the top is nailed together from both sides.  The end gables may have all the sheathing for the gable instead of the little triangle.  Then the ceiling joist is nailed on and this will sit on the top plate which will be nailed down to the plate by several toe-nailings or there is a metal tie that will join them as well.  In this case the one side is nailed flush with one nail, then the opposite side is adjusted to fit the truss pattern and measurements.  Then the opposite side is nailed down and several more nails are added at each end to stabilize it.

 
Once it is nailed, adjust the saw to 1 1/2 inches deep.

 
Saw off the excess flush with the back roof rafter.

 
Again, I am sorry not to have photographed the assembly properly.  Here the finished trusses have the roof decking nailed down every six inches.  This is ADVANTIX, but new products will come out all the time.  Ask advice locally.  

 
This is a pretty tall and skinny shed, and might be susceptible to blowing over, but this will have the joists extended to the ground and the tails attached to metal posts driven into the ground.  The roof will extend to the ground and provide rough storage and attachment to the ground.  Metal screws can be driven into the ground and attached to the shed as well.

 
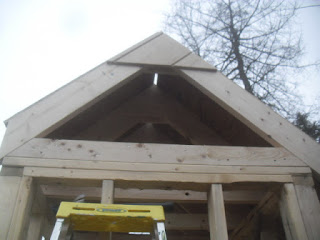
Here is a better view of the trusses.  The end trusses must have the brace attached to the side toward the center of the building.  Then a piece of 2 by 4 is nailed to the joist on the outside to provide a nailing surface.  See that it is double thickness here, and flush with the rafter above.
 
 
Another view of the end truss.  I used to small triangle here as I planned a small window on each end anyway to allow ventilation and to slide long things in on top of the ceiling joists.

 
The exterior sheathing is attached below the triangle and all the way down to the upper top plate to help join and seal it.  These do not have to fit perfectly at the edges as trim will cover it later.

 
This is T-111 or Texture 111  Many outside sheathings may be used some good along and others needing to have shingles or some other covering..  Here I was running short of material so I used two pieces.

 
The gable sheets are nailed to the roof rafters and to the top plates.  There is a flashing available to go under this sheet and over the lower wall panel.  T-111 is not terribly good when exposed to water, and this helps.  I will cover mine with wood trim instead in the Spring.

The finished frame without roof covering and sheathing, but the weather was threatening, so I decided to wrap it up and put my tools in it for the winter.  If I have a warm spell I will add the sheathing etc.

 
My cousin's husband had some left over sheets of commercial, special events tent material  I covered the walls with a couple of tarp like pieces and overlapped at the door for access.

 
I will just strip this off and do the rest of the work later.  Meanwhile the tools are inside.
To be continued later.  I will tie the whole thing down with ropes to keep from toppling it over then do what I planned to tie it to the ground with extended rafters.
 
 
This four by eight footprint could easily be used as a bunkhouse for simple shelter in the woods, as a hunting shelter or for winter activities.   This would heat with a few candles and a platform put halfway up would give you storage below and with a leg up from the doorway, you would have a sleeping platform for one or a cozy two people.,  There are tiny flat heater panels for anyplace that has electric available or a small space heater.  The Italians have heaters that burn vine trimmings and the like.  They are about the size of olive oil cans and mount on the wall with pipes that lead out to the rest of the area.  I bet a little research would find plans for a similar one in the lower level of this.  The eventual lean to back area would be a place to store an ATV or snowmobile under cover.


Wednesday, September 21, 2016

Unpleasant Duty Regarding Old Houses
It is my unpleasant duty to tell anyone who will listen about OLD HOUSES.
I just adore old houses.  I was a member of Old Sturbridge Village.  Worked as a volunteer at Kings Landing.  Strawberry Banke is marvelous,
Every house museum on the east coast is fair game on road trips.  But they can be bad news for a home owner.
I had a 1766 house in Wiscasset Maine for a number of years, and while it was a wonderful experience, it was an endless task just keeping it from collapsing into the basement.  It was hard, or damned near impossible to heat; the foundations were shakey; the sheathing was planks...wide, fascinating, and with such big gaps between them that it was impossible to secure siding without major compromises.

Old houses, even small ones as we discuss them here, are an obsession and a trial.  They require one of a couple of prerequisites before contemplating them.  You must have infinite patience with an endless timetable, or you must have abolutely skads of money.  If you do not have one of these, build new. 
If you have an old house that was on a property you owned, my advice is to tear it down, or tear it back to the skeleton, saving great materials, and rebuild. 
Of course, if you have an historic building, or a rare survivor of a particular style or time period...or perhaps the birthplace of a famous person or an ancestor...by all means ignore this post.

Old houses are....OLD.  Repairs and renovations can take decades.  If you have endless resources or endless time, then perhaps this is an endless hobby for you.  But they will only rarely save you money, no matter what the real estate agent tells you.
A beautifully restored antique house will always be appreciated by a large number of enthusiasts, and many will pay a good price for one.  But, if you are on a budget, you will always be making compromises.  Saving that 2 feet of copper wire to splice into another 4 foot piece to make a run, just to save enough to start on the next project, or to tear the sills out for replacement.  Then there are codes to contend with!
If someone handed me a broken down cape  from the 18th century, I would jump at it, but I do not have to feed my children, I can limp along with one cold room for a couple of years etc.. But the average American simply cannot do this.  In the northern states especially, you will be constantly broke trying to have enough for next winter's heating costs.
It is not hard to build a small house like some I have pictured here in the blog, and to find salvage materials to spruce up the usually antiseptic look of an new house, and have it well insulated, with good electric and plumbing on a good foundation.  All the old look can be recreated or made up from salvage.
If you are one of those with all the money...thank God for you, because these old houses often need angels who will try not to ruin them.
Just one example, I once looked at an old house for sale in Portsmouth, New Hampshire.  It was lovely in all ways, but the entire interior, lavish with 18th century woodwork, sparkled inside, as every exposed piece of wood was varnished....a great No-No.  The ad said that the inside of the house looked like it had been "CANDIED" and indeed it did!
Perhaps, as I work on my 15th century house in Italy, I may be able to remember how to address problems of the old house in America.

Tuesday, May 10, 2016

UNAVOIDABLE DAILY ACTIVITIES

Ok, so you are in your Shepherd's hut...I use that name because it is my preferred design...and there are practical daily problems to contend with.
 
If you can, you should do an outside toilet, if you have not yet purchased a composting toilet.  You can use an outhouse in some areas, but there are ways to make them much more palatable than the old fashioned ones.  Your outhouse should be on skids with large eye hooks in the end of the skids. 
Dig a shallow hole, and position your outhouse over it.  Keep peat moss in a bucket inside the building. 
Try to restrict liquids as much as possible, as there will be a problem keeping the smell down, as it will be hard to keep the surface of the accumulation dry, and you will use a ton of peat to absorb all that liquid.
 
Urinate into a sickroom urinal or a receptacle made for this purpose.  A wide mouth container will work as well.  You can glue or hook on a cup at the
front of the toilet receptacle that has a hose to drain urine into a dry well or a container to be emptied when you have done your thing, just cover it with a couple of hands-full of peat.  No smell to speak of though you can use a tiny computer fan inside a PVC pipe to exhaust air inside the bucket to the outside.
When the hole  under the outhouse is about half full, just fill it in with reserved soil, and slide your outhouse a few feet to one side and over a new hole. 
Lay a piece of exterior plywood over the old hole so no one sinks in as they walk over it. It should have settled properly by the time you move it again, and you can move the plywood safely at the same time. You can also just put a five gallon bucket under the seat, with a hinged top, and use that as a "hole" in the ground that you can empty and clean periodically, into your remote compost site, which can be engineered or just a big hole like what you would use for an outhouse.  Keep compost facilities far from and down hill from any water sources and sidelines of the property.
 
These days when so many people use bottled water, it really is a good idea to use it here for drinking and cooking.  You will be surprised how little water you use when you have to lug it everywhere, and store it.
When I was with my sister in her house that is off grid, I pumped about 30 gallons a day for all purposes, and that included a flush toilet (where liquids were saved up in the toilet, and solids were flushed immediately with half a bucket of water).
Showers can be had almost anywhere in your house.  If you are not piped into a system, where all plumbing is normal, you can heat water and do sponge baths with about two gallons of water or less.  I have a fabulous 19th century pitcher and bowl that I can use, but not for company unless they are very careful. 
Soap yourself with a cloth, wash all over.... dump out and replace the water, and rinse with fresh...use an old fashioned basin for this.  Do the same with a big wash tub on the floor if you like, and you can sit in it to rinse unreachable or difficult areas.
 
To shower, you can get an old fashioned galvanized tub for laundry as above, place it on the floor, and stand in it to wash and rinse.  Place a tub like this under a loft.  Put up a circular shower curtain-rod and curtain, above and inside the tub.  Place a bag shower above and shower that way. 
Alternatively, you can get a laundry set tub, sold in home centers.  Place it in the loft, pipe water down through the bottom of the tub and through the floor of the loft with a hand held or stationary rain shower, and shower that way with a shut off valve in the hose or plumbing.    Heat a couple of gallons of water and add cold. Pour or pump it into the set tub.  I have a little hand powered bilge pump from a boat to pump water up.  Do this while you watch a video or something.  Climb under it and shower.  If you watch the movie, "Memoirs of a Geisha", you will see the children doing this for the water in the house.
A composting septic system does not require peat moss.  My sister used five gallon buckets and used torn squares of newspaper laid over the deposit, which included urine.  When the bucket was full, she just dumped it out in a pile in a remote location, and walked away.  You can easily cover these piles with wood ash from your stove as well, or perhaps autumn leaves and grass clippings.  However, dryer is always better so separating the urine is best.
I use a very similar system here in Italy,  Only the gallons change to liters.
Many towns in remote places will allow you to use all these things.  A septic system will not likely be required if you are going to compost.  However, they will often require you to make a gray water system.  In my case, and if you are disciplined, you can use such a tiny amount of water that any system can be a little ridiculous to bother with. 
I typically consume about 2 gallons of water a day.  I do not shower every day.  The habit of showering every day is a rather recent phenomenon in this country.
It is something that is rare in many other countries, and where water is scarce.  Most people, who have access to good sources of water bathe once a week. 
Saturday night baths were a reality when I was a kid.  Once a week is not practical for me as I am very active and each individual must decide for himself what is best, a spouse will help you decide!!!  People having regular sex will likely bathe more often.  And people doing heavy work will also feel the need. 
If you are not in need of a daily bath, then the water requirement is further lessened.

Wash pots and pans and dishes with tiny amounts of heated water, and rinse in a second pan of cleaner water or pour a second container of heated water over the dish drainer to rinse.  Keep the meals simple and one pan and a plate, silverware a cup or glass will be all that is used.
In  Colonial America and in many places in Europe, it was common to have a large wooden dry sink, or a large stone sink(Elm is a common wood for sinks, dry or wet.)
The sink would have a 6 inch low spot cut in the wall of the sink on the back, where a chute was attached and led water and waste out through the wall to the outside. Sometimes these would lead directly to a garden.

There would have been a wooden block that slid into the hole to seal it up when not in use.  You can easily have a metal worker or industrial arts class make a rectangular copper sink with a spout/chute on the back from sheet metal.  Or you can just use a standard sink with the waste pipe leading out to the herb or better, flower garden against the foundation wall.  Or place a barrel there in warmer weather.  You are on your own in the winter!  Really, you just need to take a bucket
from under the sink and toss it out the door on top of the snow.  If you are in a cold area of the country, be mindful of frost lifting up the house or caving in a foundation etc. from sodden soil near the wall.
 
In past times detergents were not used.  Biodegradable soaps are available if this is a lifestyle you choose.  Chemicals and fats can build up if you do not do this, and the soil may not produce well over time.
You can also mix the water and kitchen trimmings in a barrel, and agitate it when using the water for the garden.  If you are watering plants that you will not put directly into your mouth, like flowers or fruit trees and shrubs, you can mix in 10% urine as an effective fertilizer.  Higher concentrations will burn the plant roots, though you may be able to fudge this a bit with blueberries, lingon berries or other acid lovers.
Some old houses would have a well inside the house.  One 19th century stone house at King's Landing in New Brunswick, had a well in the kitchen counter.  Just lift a hatch in the counter, and there it is.  Many rural houses have a well in the basement which can be very convenient in winter.  Just use a hand pump on the kitchen counter.  My house in Wiscasset had a plaster lined brick cistern in the basement, this could be good for roof water catching as well, but be careful of
drinking water that is standing for a while as bacteria may like it there.  Test your water regularly and keep a cover on it.  Perhaps a little chlorine?  In Europe these cisterns may be in the attic and often fill up with the most exotic bus and birds etc..  So keep it covered.
Many are lucky that they have a stand of cedar trees in the back of their property.  When it is time for screen houses and out buildings, you will be able to build with the cedar, and it will last a very long time.  Cedar peels quite easily in the spring when the sap is rising well, but it is not neccessary to peel them if you do not mind the look.  (This is probably not a good idea for a finished house interior, but for the summer house or shed, a rustic shelter or outdoor summer kitchen, unpeeled cedar would be ok.)  Also, a few protruding branch stubs make good places to hang things like towels and bathing suits.  I will have to find a similar tree in Italy now because it is very useful.  Study post and beam construction to get ideas for construction though you can always cut the logs into dimensional lumber if you have access to a portable sawmill.  Just be certain that the bottoms of posts and members like sills are not in contact with the soil or with rain splash from the soil.  Funguses and molds are in the soil and can be transferred to the wood easily. Big stones or concrete pads work well for supports to lift the bottom of the building off the ground.
A summer house can be built using a post and beam like frame.  This works well when covered with nylon or other screen, then in winter, use the clear or translucent corrugated panels that are now available to seal it all up for the winter.  This can be built virtually free up to the point of adding the screen. 
This could be a screen house, a shed, or even a bathhouse or sauna in private places.(peel the interior surfaces in a sauna so as not to support mold, and search out
ways to prevent mold and mildew.)  Leave gaps in the floor (that you can cover over with a panel) to drain water.
 
Now here is a really big issue, that few people will want to do.  If you are in an area where mosquitoes are a problem, Paint the inside of your house white or a light color.  If you love wood, as I do...Well...Suck it up!  Mosquitoes are a real disease carrier these days, and painting the interior of the house white will help you find them and eliminate them.  This is really important these days.  If you must have wood grain, pickle the surface and seal it.  Look techniques up on line.
 
There is absolutely nothing beautiful about the wood from the home center.  You might find the rare board with lovely grain, but mostly it is splintery, unremarkable spruce or pine. Bird's eye Maple or some other great wood is a different story, but construction grade wood is not worth it.  Also, your space will appear larger and you will need less artificial light in your house if you do everything in a light color! I have a white interior, and I can read till long after sunset even though the trees cover the sun earlier, with no artificial light.  My little stone house does not have windows on the west either.  Also, I can go on reading with just a candle or two if I like.  The walls reflect the light very well.
One of the great arguments for building and living in a tiny house is that it is very easy to clean.  I came back to have a short vacation in my Niece's tiny house cottage that I built for her.  I was only there a week, but of course it is not too hard to get a place that size dirty. 
I found that it may be true that it is easy to clean, if indeed, everything is built in.  However, I just cannot live that kind of a life. It somehow seems so sterile or institutional.  If I wanted to live a trailer lifestyle, I would have bought one. This space and my home in Italy are like old fashioned cottages.  There are jelly cupboards, and chairs and the built in book cases and bed. 
It takes an engineering degree to get things moved around and moved away from the walls to clean under and behind.  Where you might take a second just to move a chair to one side to clean in a normal house, in this case, you have to lift it up, and move it away to the other side of the room to have room to clean. 
Also, the dog keeps on breathing and smelling, so the space smells like old dog very quickly.
Odors are a real problem.  In both places, I bring in evergreen bouquets to help the air, and I lay out a thick towel on the beds and mound up a pile of evergreen trimmings when I am away from the house for a couple of days.
You should make some provision to exhaust cooking oils and vapors from the house.  If you have electricity, this is an easy thing, as fans are no problem.  Otherwise you can do an outdoor kitchen as I plan in my house so that messy things are done there, year round.  I used to cook in my unheated ell years ago, summer and winter.  I plan an outdoor wood fired bake oven for pizza and other baking, as well as a grill over fire for meats etc.  It is a small thing to put a couple of gas rings in the same counter as they will occupy with a gas tank from the local hardware store below them.