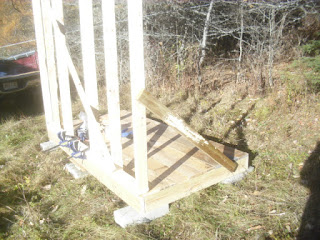
The dimensions of the base are 4 by 8 feet. the sills are made of 2 by 6 pressure treated. You have to make two layers of sill with the corners interwoven for strength. Galvanized common nails are best here where moisture might be an issue. Nail along the length as well as at the corners. Make all the nails go in at an angle. They are 3 1/2 inches long. the angle will make them protrude less and they will be stronger.
I like nails because they are less brittle than sheet rock screws. Here is a detail of the interweaving.
Do not skimp on the nails but do not use so many that they split the boards into matchsticks.
When the sills are completed, run a scrap diagonal after squaring to keep them from going off square as you work.
I did the pressure treated floor joists by toe nailing from both sides. This is pretty strong, and since the floor is small, it does not matter much as the decking will help to support it all. you can use joist hangers if you like but this was the old way and it works without the expenditure. you could put these in by doing one layer of sill, nailing through into the end grain, then adding the second layer of sill. All are sixteen inches on center beginning at the outside corner. This will work out to an even 8 feet.
Another detail of the joists.
Hemlock rough sawn is a bit thicker than normal and is rot resistant. It also provides a bit of ventilation. I am using common bright nails here because there will not be as much moisture. Use galvanized if you like.
Deck screws or nails work too.
The finished deck is set aside and the diagonal can be removed.
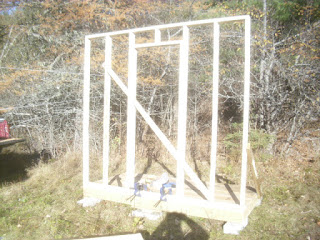
The back wall runs all the way from corner to corner. All are at 16 inches on center. As I am not finishing the inside, it is not necessary to double or triple the corner to provide a nailing surface. I am nailing through the bottom and top plate into the end grain of the studs.
Here is the front wall with its door opening. There are ripple studs and a header for the door and one small cripple. I did not make an enormous header as the weight will not be that great on this and the door will not likely fit tightly.
One of the end walls. They fit inside the two long walls so the 16 inches on center begins at the corner not at the edge of this wall. Notice the two side spaces are narrower than the center space, but they are still 16 inches on center taking the corner into account.
The other end wall. A window can always be put between the studs without special framing, especially with sheet goods. I would not try that with a house though.
The four walls are framed, but it all works better if Harry is supervising.
The deck has been placed and leveled on blocks directly on the soil. this could be put on sonotubes extending below the frost line. This could also be on large pressure treated skids laid on the ground or on a prepared site with a deep gravel base.
Sometimes boards may not be straight. Here I nailed the ends down on the deck and into the sills. I used clamps to draw the plate into line with the edge, then nail it down.
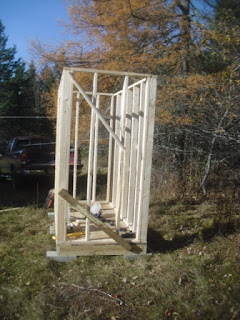
Once the wall is up and leveled up, scrap boards hold the wall up and level as you build.
Always keep larger pieces of scrap lumber if you can for such uses. Use common nails.
Notice the framing of the door. This is the front.
All four walls are up. The corner studs are nailed to each other along the length of the stud.
As above.
a second layer of top plate is nailed over the top. The corners are woven together and nailed to give strength.
Here is a finished corner.
Another view of the corner construction.
Still another.
Diagonals are left on the wall studs till permanent sheathing is installed, and metal ones may be used permanently.
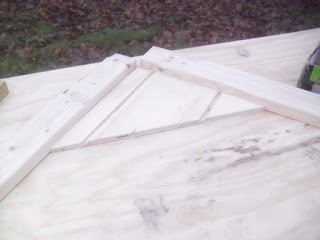
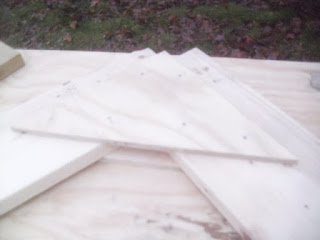
I nailed boards to a sheet of sheathing to use as a template for the seven roof trusses. I am sorry that I do not have a picture of a finished truss or their installation, the camera rebelled and it started to snow. The trusses must be nearly identical, or the roof decking will not sit flat or cooperate when nailing.
There re three layers to the upper joint of the truss. A cross piece added at the end forms the ceiling joist and keeps the rafters from spreading with snow weight. The first layer is a piece of sheet goods that will bridge the joint.
Next the joist is laid in place. this would not lie level if there was not a scrap spacer at the lower part of the template to support the legs. se a couple of photos below.
The second leg is added to the template. Aligning them properly is just as important as cutting at the proper angle. These are 45 degrees.
Measure time and time to make sure that each truss is identical. Width of the legs, length of the legs, angles fitting properly etc.
At last the tape is in the right place and the length is correct. One nail is put in the top of each leg then the measurements are checked again.
Nail in place with the one nail and check the measurements again.
Check every conceivable angle and measurement to make it come out right.
As above.
Recheck!
When all has been checked then the top is nailed together from both sides. The end gables may have all the sheathing for the gable instead of the little triangle. Then the ceiling joist is nailed on and this will sit on the top plate which will be nailed down to the plate by several toe-nailings or there is a metal tie that will join them as well. In this case the one side is nailed flush with one nail, then the opposite side is adjusted to fit the truss pattern and measurements. Then the opposite side is nailed down and several more nails are added at each end to stabilize it.
Once it is nailed, adjust the saw to 1 1/2 inches deep.
Saw off the excess flush with the back roof rafter.
Again, I am sorry not to have photographed the assembly properly. Here the finished trusses have the roof decking nailed down every six inches. This is ADVANTIX, but new products will come out all the time. Ask advice locally.
This is a pretty tall and skinny shed, and might be susceptible to blowing over, but this will have the joists extended to the ground and the tails attached to metal posts driven into the ground. The roof will extend to the ground and provide rough storage and attachment to the ground. Metal screws can be driven into the ground and attached to the shed as well.
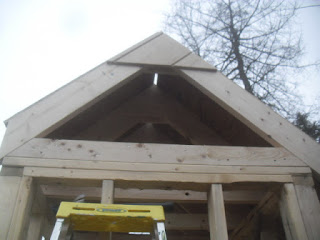
Here is a better view of the trusses. The end trusses must have the brace attached to the side toward the center of the building. Then a piece of 2 by 4 is nailed to the joist on the outside to provide a nailing surface. See that it is double thickness here, and flush with the rafter above.
Another view of the end truss. I used to small triangle here as I planned a small window on each end anyway to allow ventilation and to slide long things in on top of the ceiling joists.
The exterior sheathing is attached below the triangle and all the way down to the upper top plate to help join and seal it. These do not have to fit perfectly at the edges as trim will cover it later.
This is T-111 or Texture 111 Many outside sheathings may be used some good along and others needing to have shingles or some other covering.. Here I was running short of material so I used two pieces.
The gable sheets are nailed to the roof rafters and to the top plates. There is a flashing available to go under this sheet and over the lower wall panel. T-111 is not terribly good when exposed to water, and this helps. I will cover mine with wood trim instead in the Spring.
The finished frame without roof covering and sheathing, but the weather was threatening, so I decided to wrap it up and put my tools in it for the winter. If I have a warm spell I will add the sheathing etc.
My cousin's husband had some left over sheets of commercial, special events tent material I covered the walls with a couple of tarp like pieces and overlapped at the door for access.
I will just strip this off and do the rest of the work later. Meanwhile the tools are inside.
To be continued later. I will tie the whole thing down with ropes to keep from toppling it over then do what I planned to tie it to the ground with extended rafters.
This four by eight footprint could easily be used as a bunkhouse for simple shelter in the woods, as a hunting shelter or for winter activities. This would heat with a few candles and a platform put halfway up would give you storage below and with a leg up from the doorway, you would have a sleeping platform for one or a cozy two people., There are tiny flat heater panels for anyplace that has electric available or a small space heater. The Italians have heaters that burn vine trimmings and the like. They are about the size of olive oil cans and mount on the wall with pipes that lead out to the rest of the area. I bet a little research would find plans for a similar one in the lower level of this. The eventual lean to back area would be a place to store an ATV or snowmobile under cover.


